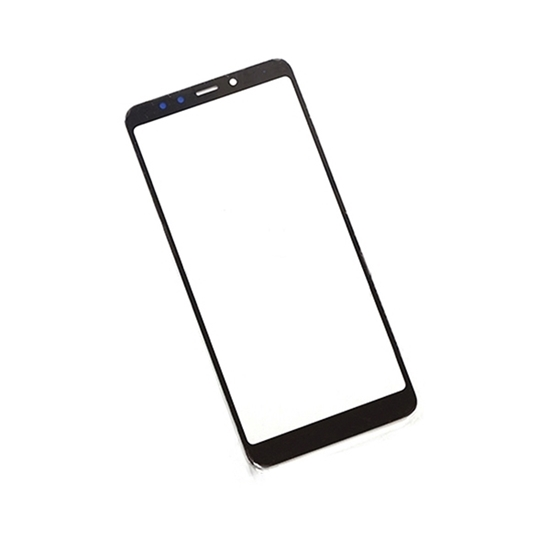
REDMI 5 OCA GLASS
Understanding the Problem and Gathering the Necessary Tools
Optically Clear Adhesive (OCA) glass plays a crucial role in the display assembly of modern smartphones, including the REDMI 5 OCA GLASS. This adhesive layer ensures that the touch screen and the display are seamlessly bonded, providing clear visibility and responsive touch functionality. Over time, various issues may necessitate the replacement or repair of the OCA glass. Common indicators include discoloration, the appearance of bubbles, or touch insensitivity, all of which can significantly impede the user experience.
Recognizing these signs is vital for determining when to undertake a repair. Discoloration may manifest as uneven brightness or color patches, indicating that the adhesive may have deteriorated. Bubbles trapped between the layers often suggest that the adhesive has lost its effectiveness, and touch insensitivity points to a potential disruption in the touch interface layer, necessitating immediate attention.
Handling OCA glass replacement involves certain risks, as the process requires precision and meticulous care. Mishandling can lead to further damage, such as cracks or scratches on the display, or even render the touch functionality entirely inoperative. Therefore, understanding the importance of a careful approach cannot be overstated.
Before commencing the repair, it is crucial to gather all necessary tools to ensure a smooth and efficient process. The essential tools for replacing the OCA glass on a REDMI 5 OCA GLASS include:
- Heat gun: For softening the adhesive to facilitate the removal of the existing glass.
- Suction cup: To lift the glass gently without causing damage to the underlying display.
- Plastic prying tools: To carefully separate the glass from the frame without scratching the surface.
- OCA glue: A replacement adhesive to bond the new glass securely.
- Cleaning cloth: To remove any dust or debris from the display before applying the new glass.
- Replacement OCA glass: Specifically compatible with the Redmi 5, ensuring a perfect fit and functionality.
Being well-prepared with the right tools and understanding the nuances of handling OCA glass will set the foundation for a successful repair. This preliminary step is crucial in ensuring that the replacement process is executed with precision, ultimately restoring the device’s optimal performance.
Step-by-Step Guide to Replacing the OCA Glass on REDMI 5 OCA GLASS
Replacing the OCA glass on a REDMI 5 OCA GLASS is a meticulous process that requires patience and precision. Follow these steps to ensure a successful replacement:
1. Preliminary Steps: Begin by powering off your REDMI 5 OCA GLASS. Remove the SIM card tray to avoid any potential damage during the process. This will ensure a safer and more convenient workspace.
2. Loosening the Adhesive: Use a heat gun or a hairdryer to warm the edges of the screen. Heating the adhesive will soften it, making it easier to separate the screen assembly from the phone body. Be cautious not to overheat, as excessive heat can damage internal components.
3. Separating the Screen: Employ a suction cup to gently lift the screen. Simultaneously, use a plastic prying tool to create an opening along the edge. Carefully work your way around the perimeter to lift the screen assembly. Take your time to avoid cracking the glass or damaging the LCD.
4. Disconnecting Display Connectors: Once the screen assembly is detached, locate the display connectors. Use a spudger or a plastic tool to disconnect them. Be gentle to prevent any damage to the delicate connectors.
5. Cleaning the Old Adhesive: Remove any remaining adhesive residue from the phone body and the screen assembly. Use isopropyl alcohol and a lint-free cloth to ensure a clean surface. This will help the new OCA glue adhere properly.
6. Applying New OCA Glue: Carefully apply the new OCA glue to the edges of the phone body. Ensure an even application to prevent any bubbles or misalignment. Align the new OCA glass precisely over the display.
7. Securing the New OCA Glass: Press the new glass gently but firmly onto the adhesive. Check for any bubbles or misalignment and adjust if necessary. Allow the adhesive to set for a few minutes before proceeding.
8. Reassembling the Device: Reconnect the display connectors carefully, ensuring they are securely attached. Align the screen assembly with the phone body and press it back into place. Ensure all edges are properly sealed.
9. Testing the Device: Power on the device to test the touch functionality and display. Verify that the screen responds accurately to touch and that there are no visual defects. This step is crucial to confirm the replacement was successful.
By following these steps meticulously, you can successfully replace the OCA glass on your REDMI 5 OCA GLASS. Always prioritize safety and patience throughout the process to avoid any damage to your device.

REDMI 5 OCA GLASS
NOTE : GSMSMARTPRICE is gathering the best information from various websites live prices may defer from the listed price


Reviews
There are no reviews yet.