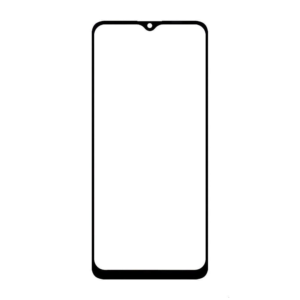
TECNO CAMON 15 OCA GLASS
Tools and Materials Needed
Successfully repairing the OCA glass of a TECNO CAMON 15 OCA GLASS requires an array of specialized tools and materials. Below is a comprehensive list of what you will need:
Heat Gun: A heat gun is essential for softening the adhesive that holds the OCA glass in place. This allows for easier removal of the damaged glass without causing further harm to the device.
Plastic Prying Tools: These tools are used to gently lift and separate the OCA glass from the screen. They are designed to prevent scratching or damaging the delicate components of the smartphone.
Tweezers: Precision tweezers are crucial for handling small parts and components during the repair process. They help in removing tiny debris and positioning the new OCA glass accurately.
Adhesive Remover: Specially formulated adhesive remover is used to clean off any residual glue left on the screen after the old OCA glass has been removed. This ensures a smooth and clean surface for the new adhesive to bond properly.
Microfiber Cloth: A microfiber cloth is vital for cleaning the screen and other components without leaving lint or causing scratches. It ensures that the surface is pristine before applying the new OCA glass.
Replacement OCA Glass: The core of the repair process, a high-quality replacement OCA glass ensures that your TECNO CAMON 15 OCA GLASS screen looks and functions as good as new.
UV Lamp: After applying the new OCA glass, a UV lamp is used to cure the adhesive. This step is crucial for ensuring that the adhesive sets correctly and provides a strong bond.
In addition to these tools and materials, safety measures are paramount. Wearing anti-static gloves helps to prevent static electricity from damaging sensitive electronic components. Moreover, performing the repair in a dust-free environment minimizes the risk of contaminants getting under the new OCA glass, which could affect the screen’s clarity and performance.
By gathering these tools and materials and adhering to safety precautions, you will be well-prepared to undertake the repair process with confidence and precision.
Step-by-Step Repair Process
Repairing the OCA glass on a TECNO CAMON 15 OCA GLASS requires meticulous attention to detail and adherence to safety protocols. Follow these steps carefully to ensure a successful repair.
First, power down your TECNO CAMON 15 OCA GLASS completely. This is crucial to avoid any electrical mishaps. Once powered down, begin by removing the back cover. Use a plastic opening tool to gently pry the cover off, starting at one corner and working your way around the edges. After the back cover is off, carefully disconnect the battery to prevent any short circuits. This typically involves unscrewing a few screws and gently lifting the battery out using a plastic tool.
Next, you need to remove additional components to access the damaged OCA glass. Detach the screws securing the motherboard and other internal components. Take note of the screw placements and keep them organized, as this will make reassembly easier. Once all screws are removed, gently lift the motherboard and other components, exposing the damaged OCA glass.
To remove the old OCA glass, use a heat gun to soften the adhesive. Set the heat gun to a moderate temperature and evenly heat the edges of the glass for about a minute. Be cautious not to overheat as this could damage the LCD. After heating, use a plastic prying tool to carefully lift and remove the old glass. Take your time to avoid cracking the underlying LCD screen.
With the old glass removed, it’s essential to clean the LCD screen thoroughly. Use an adhesive remover to eliminate any leftover adhesive residues. Ensure the surface is spotless before proceeding to the application of the new OCA glass. Position the new OCA glass over the LCD, making sure it aligns perfectly. Use a UV lamp to cure the adhesive, ensuring a strong and lasting bond.
Now, reassemble the phone by reversing the disassembly steps. Reattach the motherboard and other internal components, ensuring all connections are secure. Reinsert the battery and screw it back in place, then snap the back cover on. Power on the Tecno Camon 15 to test the functionality of the new glass. Check for responsiveness and clarity to ensure the replacement was successful.
If you encounter issues such as unresponsive touch or misalignment, recheck the connections and ensure the glass is properly adhered. Taking these steps will help ensure that your TECNO CAMON 15 OCA GLASS is restored to optimal functionality with its new OCA glass.

TECNO CAMON 15 OCA GLASS
NOTE : GSMSMARTPRICE is gathering the best information from various websites live prices may defer from the listed price


Reviews
There are no reviews yet.